OpenVPN Server on ubuntu 12.10 with Nexus7 as a client
</b>
I'll leave the job of explaining vpn to someone else, and read this prelude to get familiar with how this can be of help.</p>
OpenVPN is an open standard, companies use it in production, of course with a lot more security, but its in a lot of people's interest for this to be the most secure as possible, so it can be trusted, to some extent. The platform is ubuntu 12.10, and here's how:
Server Installation
sudo apt-get install openvpn
Public Key Infrastructure Setup
You need three things, the first is the CA key to sign every other key, the second is the key for your server, the third is a key for your clients.
copy these files from the openvpn installation to a directory at /etc/openvpn/easy-rsa/
mkdir /etc/openvpn/easy-rsa/
cp -r /usr/share/doc/openvpn/examples/easy-rsa/2.0/* /etc/openvpn/easy-rsa/
Edit /etc/openvpn/easy-rsa/vars
vi /etc/openvpn/easy-rsa/vars
export KEY_COUNTRY="US"export KEY_PROVINCE="MD"export KEY_CITY="CharmCity"export KEY_ORG="PAD"export KEY_EMAIL="admn@PAD.LAN"</p>
Generate the CA certificate and key:
cd /etc/openvpn/easy-rsa/
source vars
I got the following error
************************************************************** No /etc/openvpn/easy-rsa/openssl.cnf file could be found Further invocations will fail**************************************************************</p>
you can check your version with will show you your version
dpkg -s openssl
Architecture: amd64Version: 1.0.1-4ubuntu5.5</p>
But inside the directory, there's no version that is 1.0.1,
ls /etc/openvpn/easy-rsa/ | grep openssl
openssl-0.9.6.cnfopenssl-0.9.8.cnfopenssl-1.0.0.cnfopenssl-1.0.0.cnf-old-copyopenssl.cnfwhichopensslcnf</p>
We change /etc/openvpn/easy-rsa/vars file again, to match the closest version
vi /etc/openvpn/easy-rsa/vars
# This variable should point to# the openssl.cnf file included# with easy-rsa.export KEY_CONFIG=`$EASY_RSA/openssl-1.0.0.cnf $EASY_RSA</p>
We continue to build CA, I recommend, you call your CA: ca for common name
./clean-all
./build-ca
Server Certificates
Built certificate and private key for the server [server is the host where you installing openvpn]:
./build-key-server ns
Make sure you
./build-dh
All certificates and keys can be found in the subdirectory keys/.
cp ns.crt ns.key ca.crt dh1024.pem /etc/openvpn/
Client Certificates
Here you create the keys to your clients, [hosts connecting to the vpn], I'll be creating it for my laptop and nexus 7:
cd /etc/openvpn/easy-rsa/
source vars
./build-key nexus7</div>
</b>
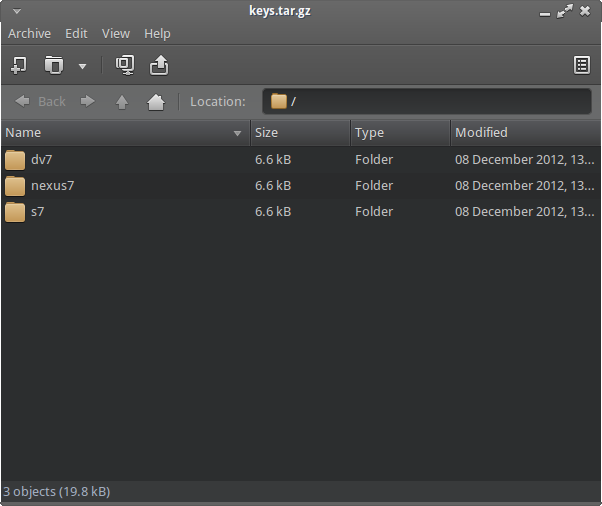
REMOVE THE CERTIFICATES WHEN YOU ARE DONE, you can recreate them anytime. for your own security, you can package them like I did, copy each each of these folders to the clients.
Simple Server Configuration
Along with your OpenVPN installation you got these sample config files (and many more if if you check):
</div>
client.conf server.conf.gz</p>
Unpack config, to your server, we'll edit that config
sudo cp /usr/share/doc/openvpn/examples/sample-config-files/server.conf.gz /etc/openvpn/
sudo gzip -d /etc/openvpn/server.conf.gz
Edit /etc/openvpn/server.conf to make sure the following lines are pointing to the certificates and keys you created in the section above.
ca ca.crt
cert ns.crt
key ns.key
dh dh1024.pem
create ta key [another security barrier]
openvpn --genkey --secret /etc/openvpn/ta.key
check syslog for errors [tail -f /var/log/syslog]
root@ns:/etc/openvpn# /etc/init.d/openvpn start
* Starting virtual private network daemon(s)...
* Autostarting VPN 'server' [ OK ]
Now check if OpenVPN created a tun0 interface:root@ns:/etc/openvpn# ifconfig tun0
tun0 Link encap:UNSPEC HWaddr 00-00-00-00-00-00-00-00-00-00-00-00-00-00-00-00
inet addr:10.8.0.1 P-t-P:10.8.0.2 Mask:255.255.255.255
UP POINTOPOINT RUNNING NOARP MULTICAST MTU:1500 Metric:1
NAT-ing
Allow your server to forward requests using ipv4</div>
net.ipv4.ip_forward=1
echo 1 > /proc/sys/net/ipv4/ip_forward
Allow post routing on your interface. Assuming it is eth0, do ifconfig, and check your interface, hopefully you aren't one of those crazies trying to do it on wlan0.
To make it permanent you need to:
sudo nano /etc/rc.local
Add the line:
iptables -t nat -A POSTROUTING -s 10.8.0.0/24 -o eth0 -j MASQUERADE
just before: exit 0
On Linux, you could use a command such as this to NAT the VPN client traffic to the internet:
Server Config
grep ^[^#] /etc/openvpn/server.conf
</div>
;local a.b.c.d
port 1194 #default port;
proto tcp
proto udp;
dev tap
dev tun;
dev-node MyTap
ca ca.crt
cert ns.crt
key ns.key # This file should be kept secretdh dh1024.pem tls-auth ta.key 0 #this is important
topology subnetserver 10.8.0.0 255.255.255.0 #client's ip on tunnel
cipher BF-CBC # Blowfish (default);cipher AES-128-CBC # AES
;cipher DES-EDE3-CBC # Triple-DES
comp-lzo
;max-clients 100
user nobody #this option is picky, you can specify usr
group nogroup # or group if you sure they won't change
persist-keypersist-tun #increased logs and to a specific folder , make sure you create a folder called [mkdir -p /var/log/openvpn/]
status /var/log/openvpn/openvpn-status.log
log /var/log/openvpn/openvpn.log
log-append /var/log/openvpn/openvpn.logverb 6
mute 10 #mutes output after 10 repetitionifconfig-pool-persist ipp.txt; server-bridge 10.8.0.4 255.255.255.0 10.8.0.50 10.8.0.100
;server-bridge
push "route 192.168.0.0 255.255.255.0" pushing routes to client
;push "route 192.168.20.0 255.255.255.128"client-config-dir ccd
;route 192.168.95.0 255.255.255.128
;client-config-dir ccd
;route 10.9.0.0 255.255.255.252
;learn-address ./script
;push "redirect-gateway def1 bypass-dhcp"
push "redirect-gateway def1"
push "dhcp-option DNS 192.168.1.1" #pushing dns to client
push "dhcp-option DNS 8.8.8.8"
push "dhcp-option DNS 8.8.4.4"
client-to-client
;duplicate-cn
keepalive 10 120</p>
Simple Client Configuration [Ubuntu LAPTOP]
sudo apt-get install openvpn
sudo apt-get install network-manager-openvpn openvpn
Download and extract your configuration files.
dv7.crt dv7.key ca.crt
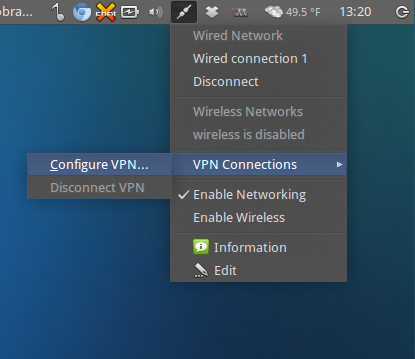
1) Under Network Manager go to VPN connections -> Configure VPN
</div>
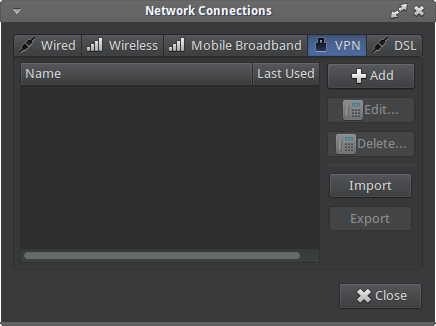
2) Click Add under VPN tab
</div>
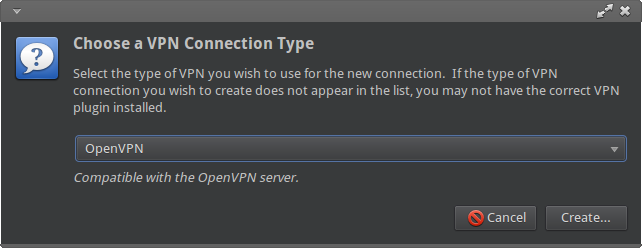
3) Select OpenVPN under options and click Create</p>
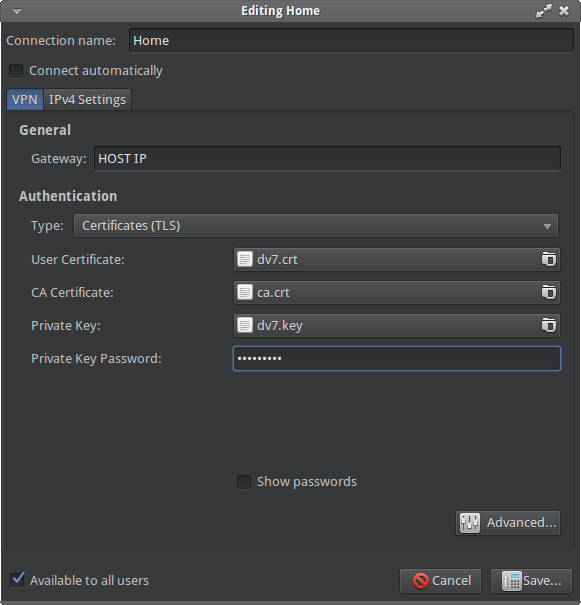
4) Fill form using your OpenVPN configuration file</div>
CA Certificate will be your ca.crt
Private Key will be your dv7.key
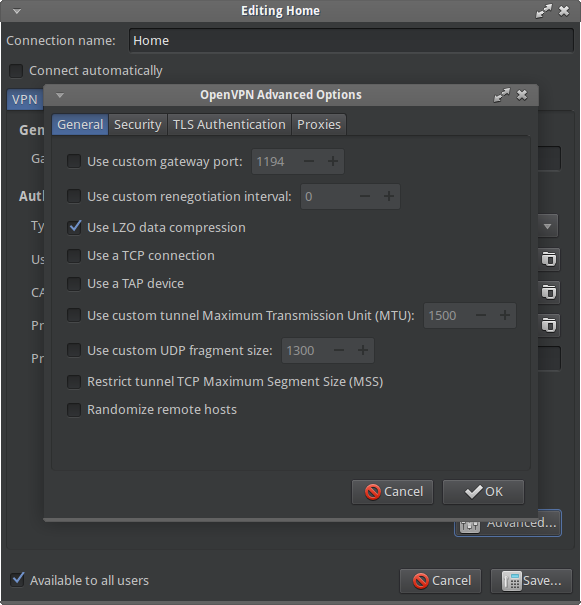
6) Under Advanced fill port, using OpenVPN configuration file
</div>
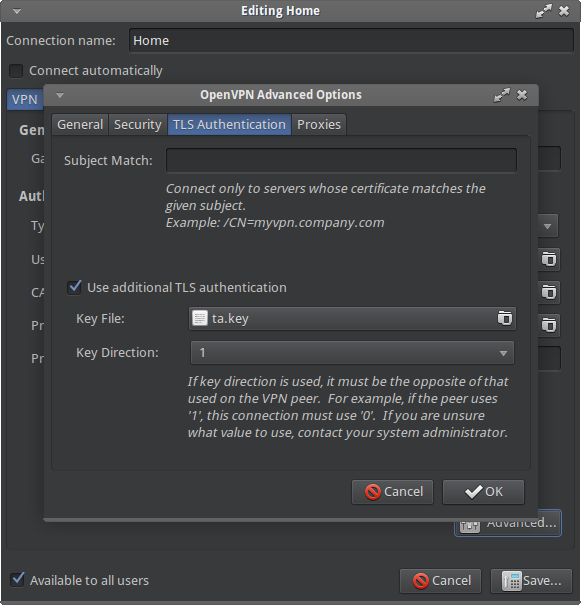
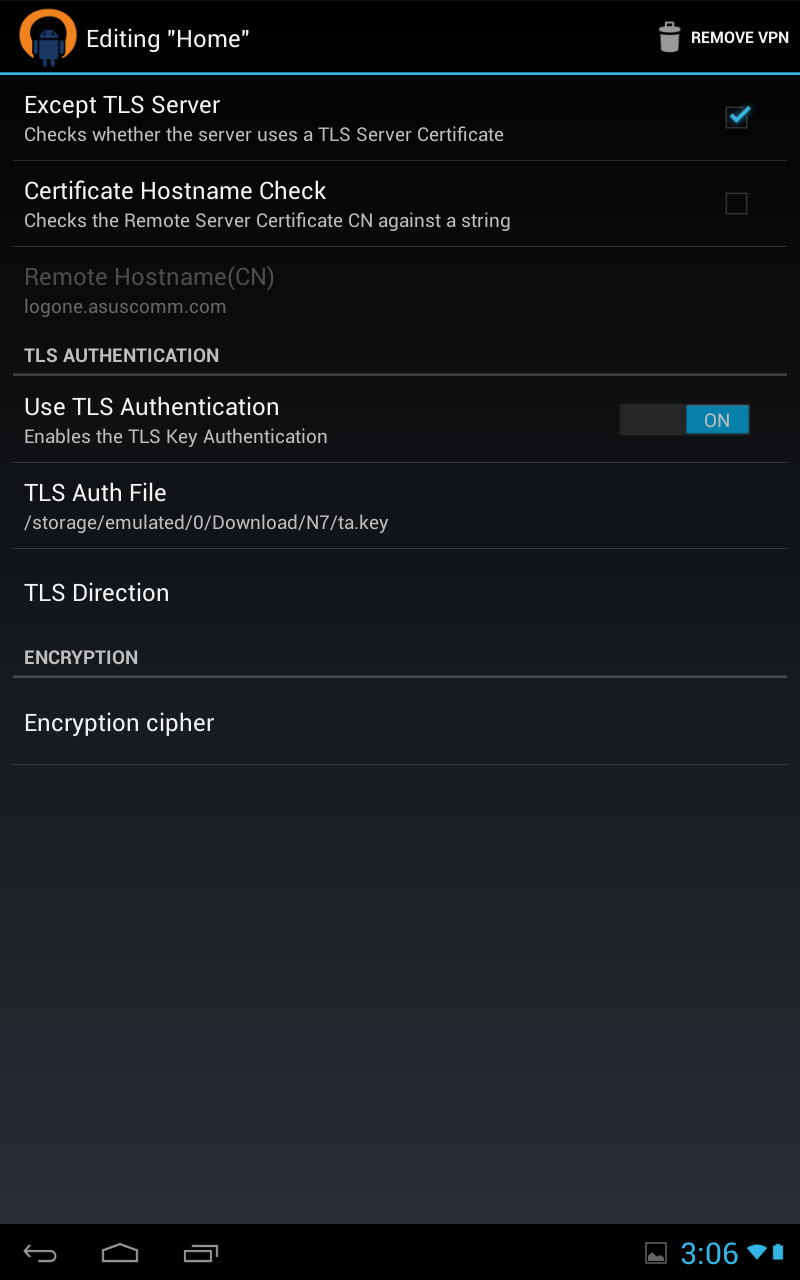
7 ) Under TLS Authentication tab
check option Use additional TLS authentication
8) For Key file import your ta.key file</div>
Ok under Advanced and Apply to save all
</div>
11) Try to connect choosing Home from VPN connections

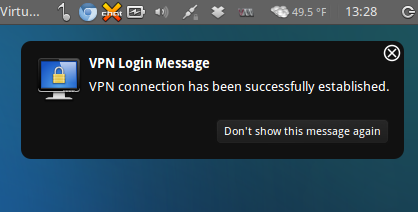
12) Done, we’re connected now</p>
</b>
Simple Client Configuration [NEXUS7]
 Unfortunately, I do not know if these instructions will work on a non rooted nexus7, mine is rooted, all my devices are rooted. </div>
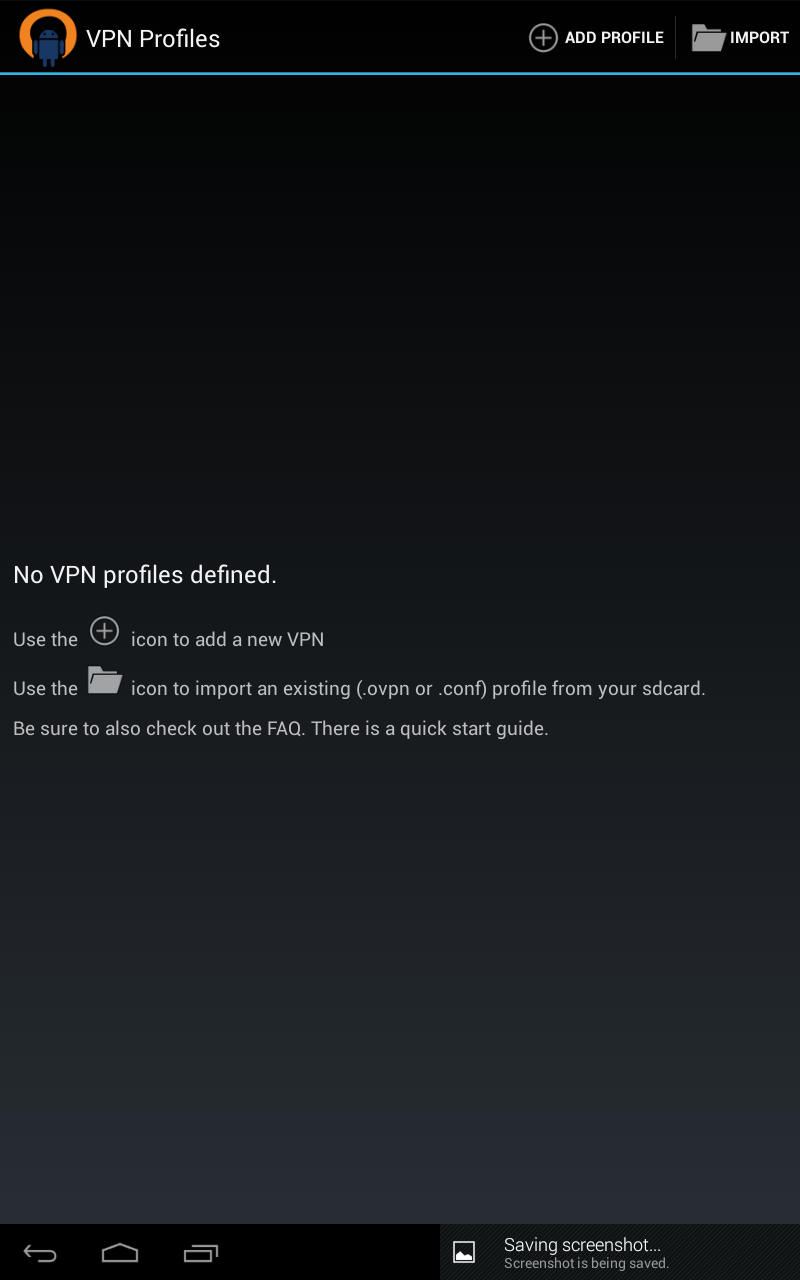
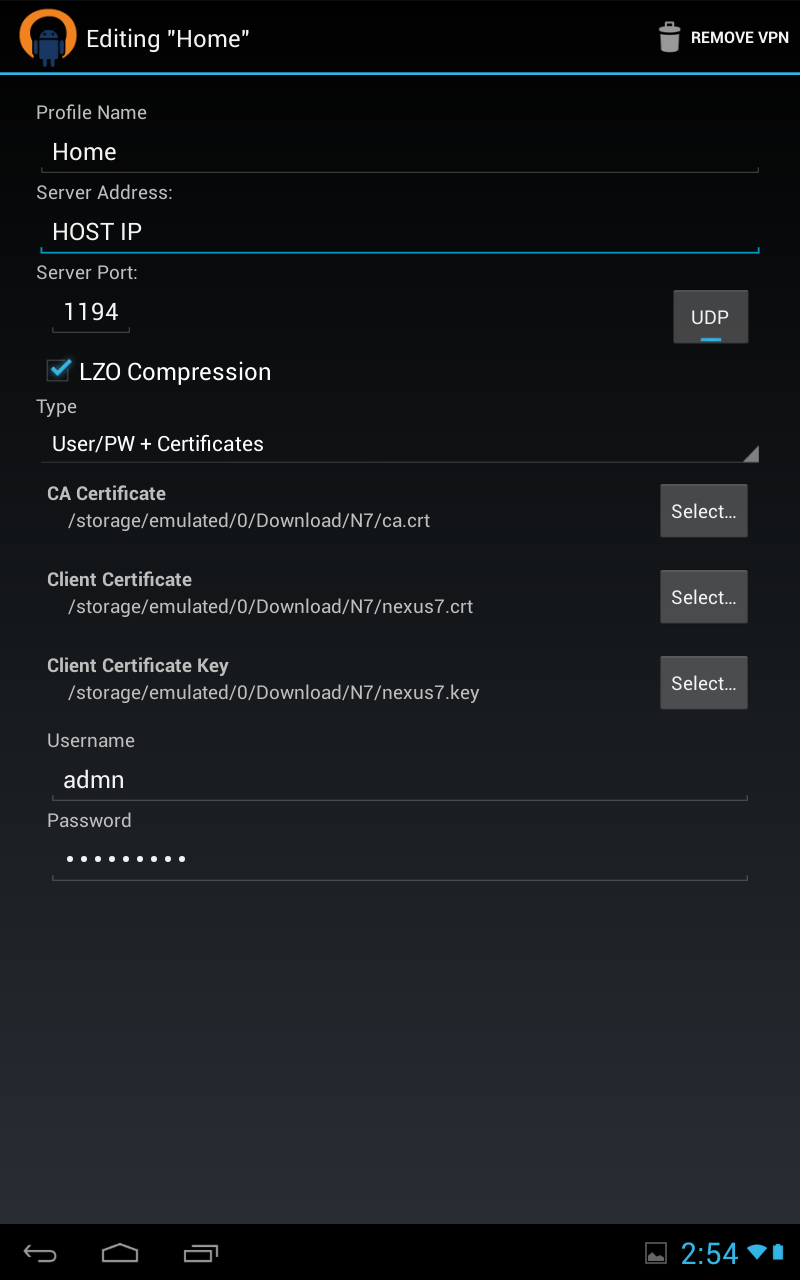
First copy certs to your phone, I honestly scp-ed them over, but its another tutorial on its own, you can dropbox it over, or google drive. the app knows how to fetch things from your sd. Click on vpn profile

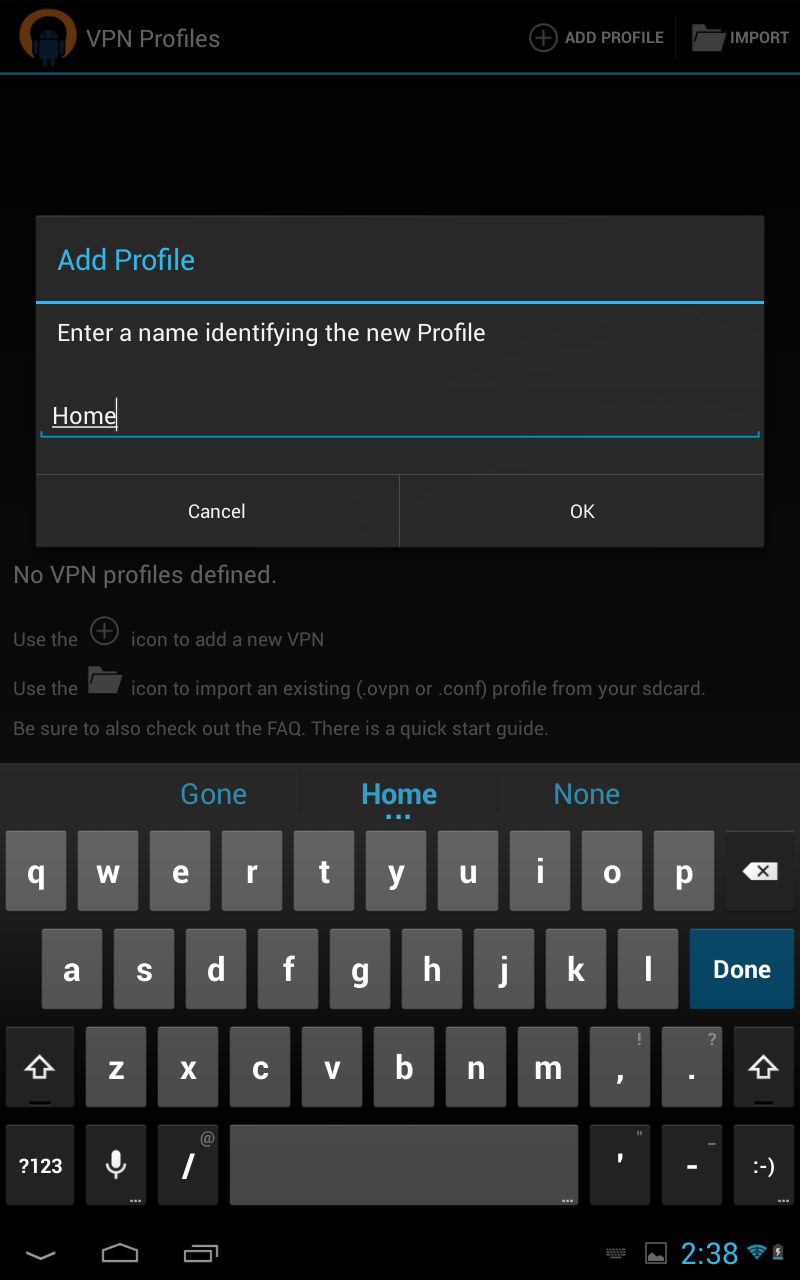
Then select add profile


</b>
</div>